'Budget wedding flowers' Category

Budget London Wedding Venues

Maybe it’s the dark of January and that urge to hope and plan that comes with darkness.  Maybe it’s the impending financial uncertainty. Maybe it’s the fact I haven’t been to a wedding in ages and I LOVE weddings.  Whatever it is, something this morning reminded me of how difficult it was to find cheap but lovely London wedding venues and I wondered how the ones we considered before settling on our Kent location were faring — and charging — in 2020.

The venues listed here are all ones we considered for our DIY, crafty, family-friendly wedding.

London Wedding Venues Under £1k

Suburban Village Halls

Village Halls

We looked at a village hall in a London ‘burb which has self-catering facilities, tables, chairs etc for over 100 guests and a small grassed area.  We would have filled it with fairy lights, lamps and tealights to avoid the neon strip lighting. They charged £21 per hour before 6pm and £24 per hour after.  A group were in the night before and early Sunday morning (6am) which is what put us off.

Ruskin House, Croydon

Ruskin House, a licensed wedding venue near West Croydon, had a large, pretty and playful garden with a BBQ area and a large hall set in its grounds, with its own bar, as well as a hall in the main part of the house.  There was a small room — the Mandela Room — where you could get legally married, which accommodated 50 guests, while the halls had capacity for 120. The doors to the Mandela Room opened onto a patio area, so there would be scope to have more guests gather outside, or perhaps you could live stream the ceremony with a projector in the garden… There’s also a small members’ bar on site and various community meetings and activities (like the Green Party, Folk Club and Croydon Trade Union Movement), so when we visited when planning our wedding, we were kindly reminded that the building wouldn’t be exclusive hire.  However, in 2016 the costs were £475 including the ceremony room, garden and garden hall (registrars in Croydon charge a £300 call out fee which took it up to £775 overall) – a London wedding venue for under £1,000 (email for current prices). You could DIY food – a picnic and BBQ in the garden would be perfect. You could also supply your own fizz and the bar was reasonably priced. https://ruskinhouse.org/hire/ 

The Centre, Wallington

This venue was in the grounds of a church in the SW London suburbs – so still accessible by public transport if you’re not averse to a bus.  They were very flexible and enthusiastic and had suitable outside space for kids to run around, as well as being open to use decorating however we wanted to. They also allowed access the evening before for setting up. There was a stage, which meant we could have had the glorious open mic music and poetry we did at our wedding.  We needed to do self-catering, due to our budget, but this meant we would also have had to clean up the party ourselves and the venue was needed the next morning for a church event. I couldn’t quite visualise hoiking up my white dress and putting on my marigolds after the reception, but perhaps it would have been fun! The package we were quoted, for hire, tables, covers, etc, came in under £1k.  thecentrewallington.co.uk

Carshalton Water Tower

Another SW London venue, near Carshalton Station. It’s around £60/hour to hire and is an extremely pretty listed building, with quirky features like the pump room and airy, bright saloon and orangery.  It’s set in the grounds of St Philomena’s school, so is surrounded by greenery.


London Wedding Venues £2k – £3k

Skip Garden

This King’s Cross venue looked really exciting and celebrates sustainability and the kind of craftiness we love.  Although outdoors, they had a cover available for half of the venue on a rainy day. They produce their own food from eco friendly sources and the gardens themselves.  Our kids were too tiny for us to feel like it was the perfect option, but it would make a really lovely venue. Costs are not listed, but were within this range when we enquired.

https://www.globalgeneration.org.uk/hire-our-space 

Avenue Halls, Kew 

This venue – a large church in Kew, SW London – looked extremely pretty from the website, although we never quite made a visit.  It’s currently £102 per hour to hire the largest hall, or £72 per hour for the smaller. If you’re having a small wedding, there is a new, airy room with views onto the garden at £30 per hour, with capacity for 30 guests. https://www.avenuehalls.com/ 

The London Canal Museum

This lovely venue in North London allows you to arrive by Canal boat.  Couples often get legally married in Islington Town Hall, before their reception (which is, of course, a separate cost).  In 2016 it was about £1.5k for a party from 5-11pm, or £1.8k till midnight, with no corkage. It’s not much more now – around £2k for a full hire with extras.  I think you can self-cater but you can definitely choose your own caterer.   http://www.canalmuseum.org.uk/venue/wedding.htm


The Alternatives

Midweek Registry Office

Generally speaking, it’s around £50 for a basic registry office legal bit with two witnesses, on a weekday.  You can then have a ceremony of your own design led by a friend or family member on your wedding day in any reception venue of your choice.  It costs a few hundred quid or more to get an official registrar out to a licensed venue, on top of the venue hire fee. Link for your own ceremony ideas: https://humanism.org.uk/ceremonies/non-religious-weddings


Wedding Auction Site 

You can help out people who have decided not to go ahead with their venue booking for whatever reason by buying discount weddings on https://www.cancelledweddings.co.uk/ 


Happy to help. There are ideas for even the least crafty among us on my other pages, including outdoor venue decoration, corsages, food, drink and more on my earlier pages.  Have a wonderful day!


Low Waste, Upcycled Buttonholes (Boutonnieres) – Easy Wedding Crafts for the (Un)Crafty Bride on a Budget

Of all the makes for the wedding, this is the one I had to practise the most before finding something I was happy with.  The initial attempts included glitter foam and pyschedelic, pink and orange rosebuds – they ended up on our flower girl baskets.

Finally, after quite a few glue gun blisters and times spent lying on the carpet in a world of self-doubt, I made these.

Bow Tie and Kerchief from Le Colonel Moutarde

I made these buttonholes based on a tutorial in ‘Handmade Weddings’ by Moyle, Moyle and Faust (Chronicle Books), which was kindly handed down to me by the teacher of one of my preschooler’s activities.  Mine are a more-rustic adaptation.

Here’s a How To…

Materials:

Old clothes (my daughters’ outgrown winter dress and summer dress, in rainbow colours)

White felt, leftover from a craft project

Florist wire (also used for the bouquets)

A second-hand pair of dark green corduroy trousers

Wool (leftover from pom pom making)

Glue gun and glue sticks

Pins with rainbow heads (ebay)

Scissors

Method: 

  1. Cut strips out of the old clothes and felt, measuring approx. 3″ (7.5cm) wide and about 5-6″ (12-15cm) long.
  2. Fold them in half, lengthways.
  3. Cut into the fold, stopping about 1/4 inch from the edge of the fabric. Make these cuts all the way along the length, with about 1/8 inch between each. This will create a fringe effect.*
  4. Pipe a line of hot glue along the uncut edge, then roll the uncut length up tightly, having shifted the tips of the fringe to a slight angle away from the direction you’re rolling in (the angle isn’t essential, but creates a nicer shape if you are able to do it).*
  5. Fluff up the bud.
  6. Glue in a piece of florist wire.
  7. Cut a leaf shape out of your chosen green fabric.
  8. Put two buds together, and fold the base of the leaf around them, sealing (inside) with hot glue.
  9. Double up the florist wire to make a more substantial ‘stem’ and wrap this loop with either brown or green wool.

Et voila! Les boutonnieres!

* High Tech Paper demonstration of 3 and 4:


A link to Handmade Weddings 

Wedding Table Decorations, Favours and Bring and Share Decorations for the (Un)Crafty Bride on a Budget

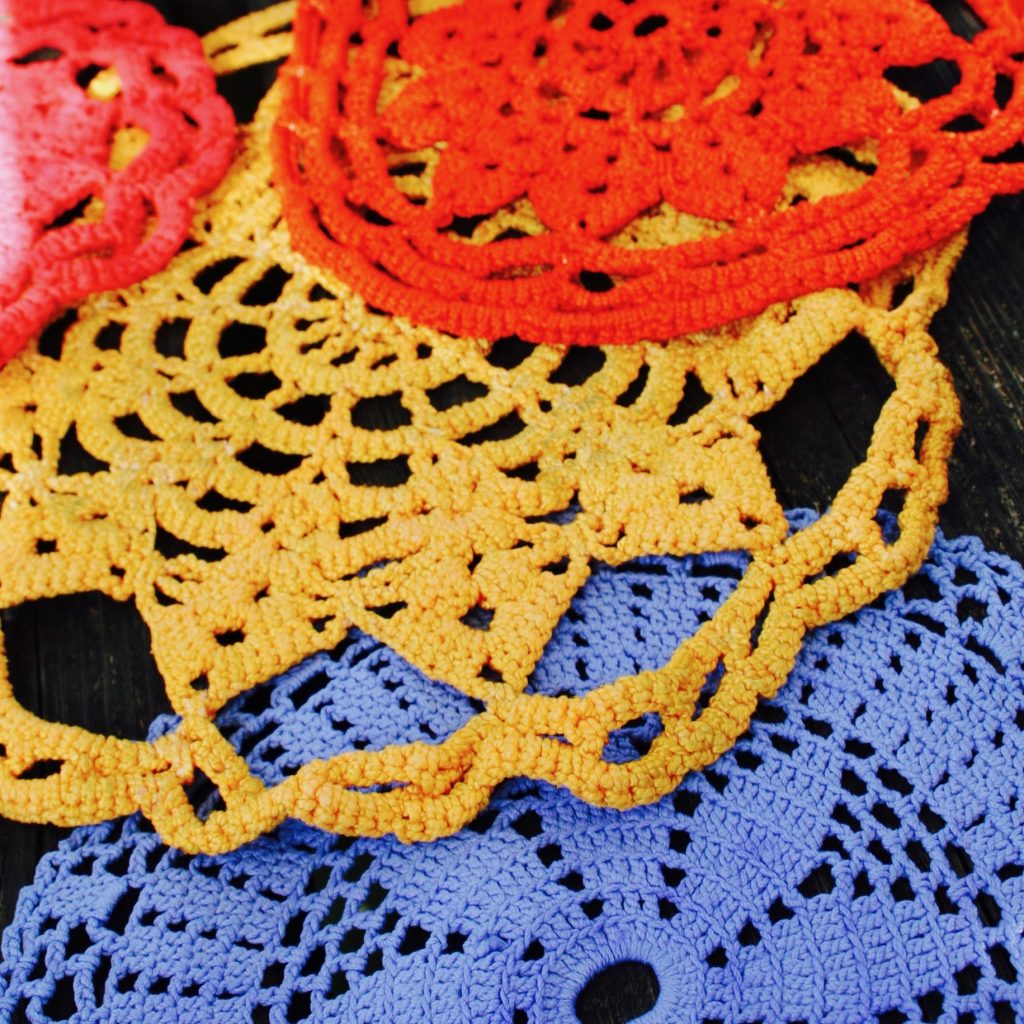
Months before my wedding, I was playing with my kids in a local woodland when my phone rang.  It was one of my best friends, and bridesmaid.  Noone ever uses phones any more, do they? And I knew she was in her family home country.  I picked up, concerned.  What happened next reminded me of the time my mum, then in the early days of cancer, rang me at work – Mum had an urgent question about a black catsuit (this black catsuit, to match her own…).  My lovely friend had found hundreds upon hundred of doilies, hand crocheted by her great grandmother, along with ribbons and collars of lacework.  

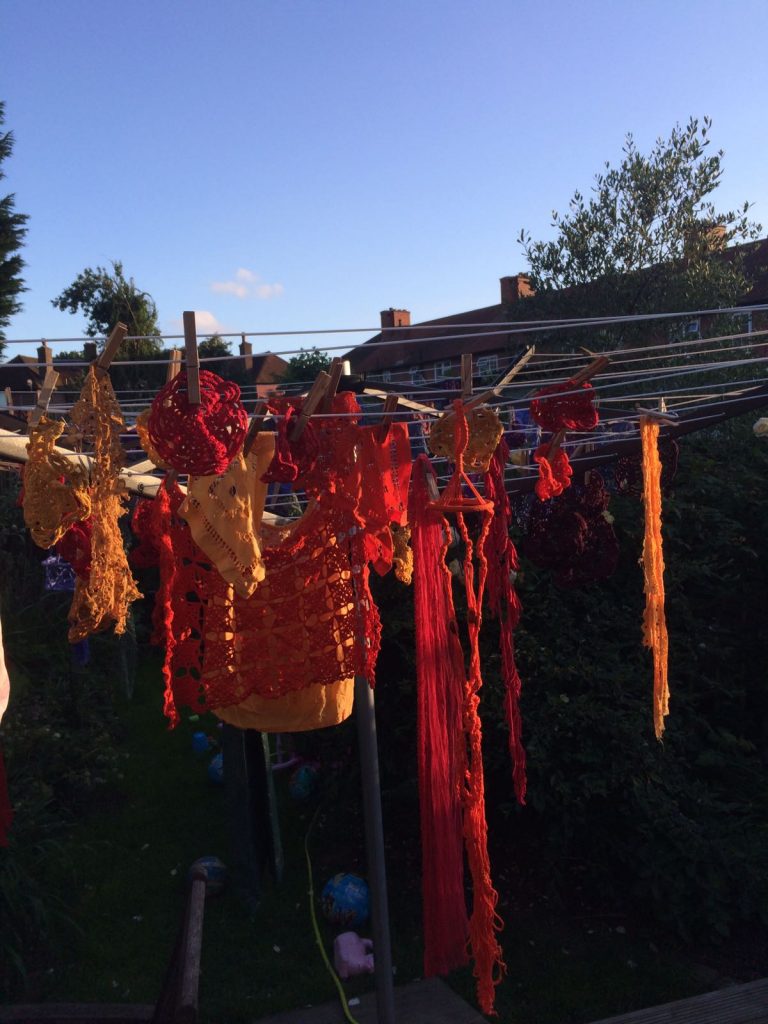
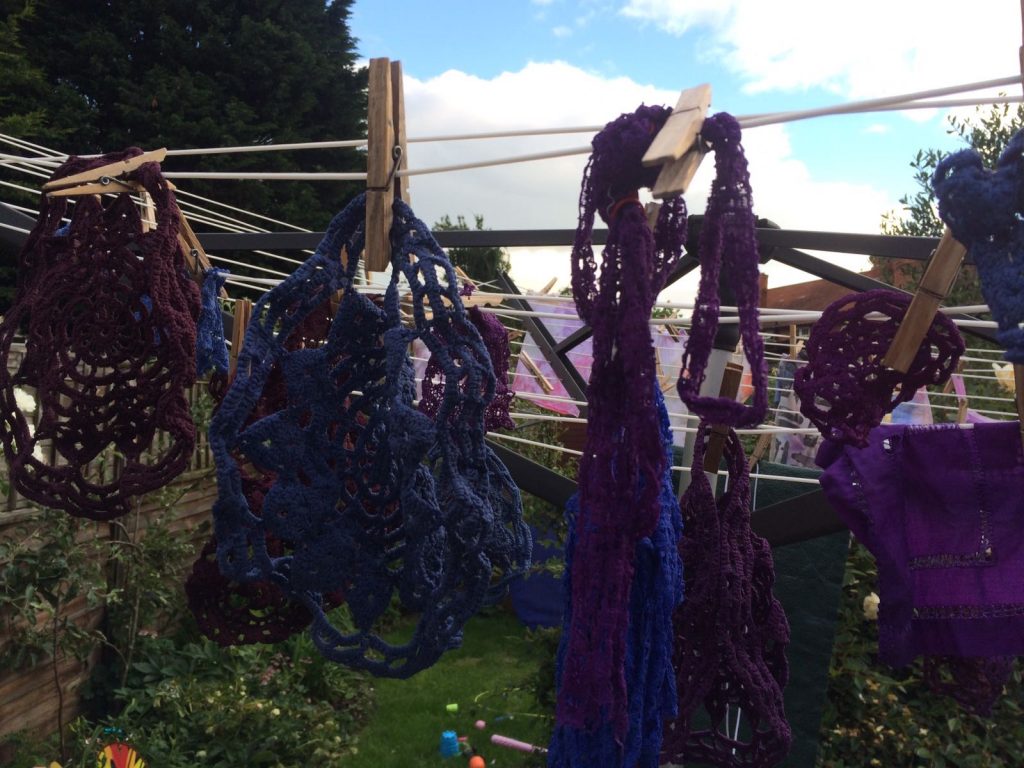
Sharing love-driven, crafted, storied objects was very much something my husband and I wanted to do as part of our wedding.  We marry into a family, into a community, into a history of human love.  My friend and I had a few thoughts about what to make her great grandmother’s doilies into.  One idea was bunting.  Another was to push the bulbs of fairy lights through their centres, so they looked like flowers.  In the end, we decided to dye them the colours of the rainbow, and use them to decorate the large, round tables and picnic tables that we were having our wedding breakfast on, in the gardens.  

We used Dylon polyester dye, seven huge buckets (which we each needed for our gardens afterwards), a bottle of rose and a Sunday afternoon, to make this glorious rainbow…

In the year and a bit between getting engaged and getting married, my family and several kind friends saved jars.  We stored ours in the garden, in crates, which meant that the weather did a lot of the work of removing labels for us.  These went onto tables, with candles, as well as reusable straws, pencils and colouring sheets for younger children, or wood and paper photo props for older children and teens.  The different shapes and qualities of glass caught the sunlight beautifully.  

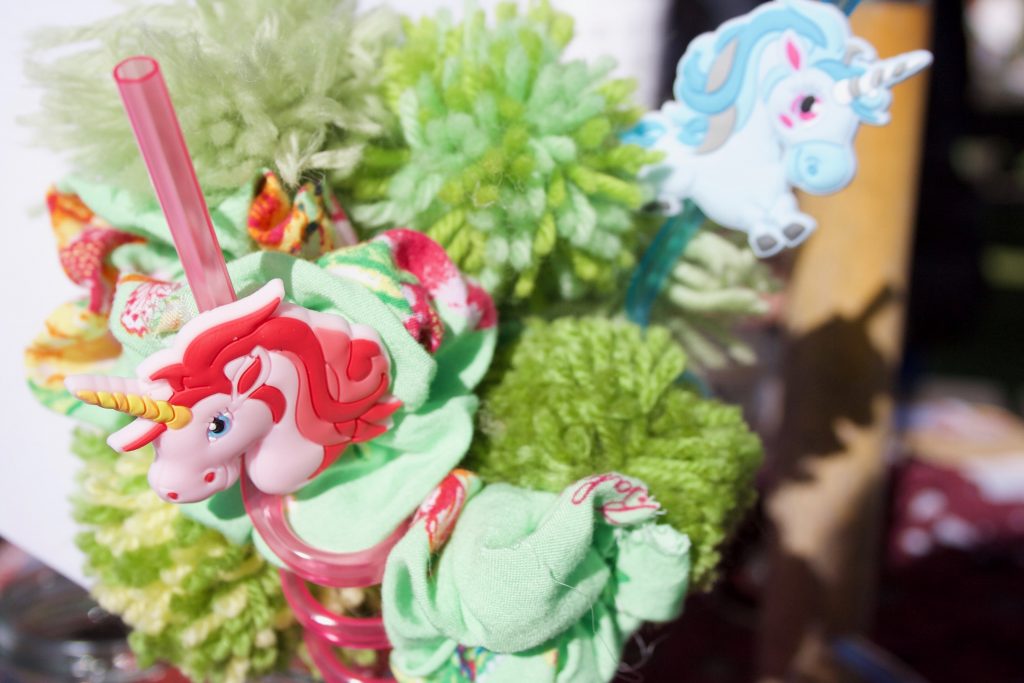
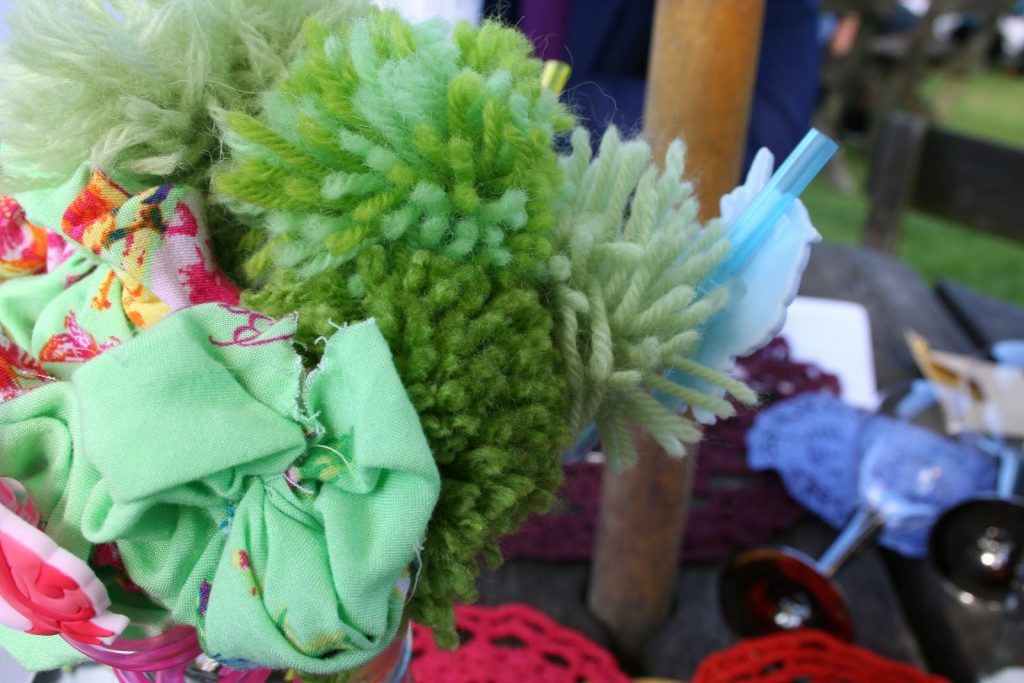
We put the differently-coloured bouquets of fabric wedding flowers in glass jars when back from the ceremony (here’s how I made the fabric flowers) and made additional pom pom bouquets (here’s a super easy pom pom tutorial).

Favours also served as name cards.  Small children had envelopes with their names on, with stickers and card inside.  Older children and teens had second-hand card games, again in envelopes with their names on.  Friends whose beliefs reject gambling had delicious jam.  For everyone else, we chose Lottery Scratchcards, as they are potentially fun, recyclable and contribute to charity.  It would have been amazing if someone had won their train fare.  The only regret I have is that I bought some brown envelopes with gold, glittery insides, to signify pots of gold (at the end of a rainbow).  I overlooked that this would leave the envelopes unrecyclable.  Moreover, we have since learned about the damage that glitter does to the environment, and are moving away from using conventional glitter and are planning to make our own from salt or sugar (like this) or buy biodegradable for special projects, like this Etsy product I am planning on trying soon (Etsy biodegradable glitter). Any glitter we still have will be for keep-forever crafts, like Christmas ornaments.  We are also a lot more aware about creating the demand for plastic, and perhaps would rethink buying plastic reusable straws, and go for something like stainless steel ones. I would love to hear more ideas for sustainable / zero waste alternatives to what we did, in the comments.

Instead of a guest book, we asked guests to bring photos, pictures, poems, lyrics or anything that showed ‘family’ and ‘love’ to them, and add it to our bunting (twine, with little wooden pegs).  We also printed off photos of us with everyone at the wedding, and pegged this up to get the bunting started.  It was gorgeous, and deeply personal, as well as being a great conversation maker, and we will keep the beautiful things our loved ones shared on it, forever.

(Un)Crafty Bride on a Budget: DIY Wedding Hair

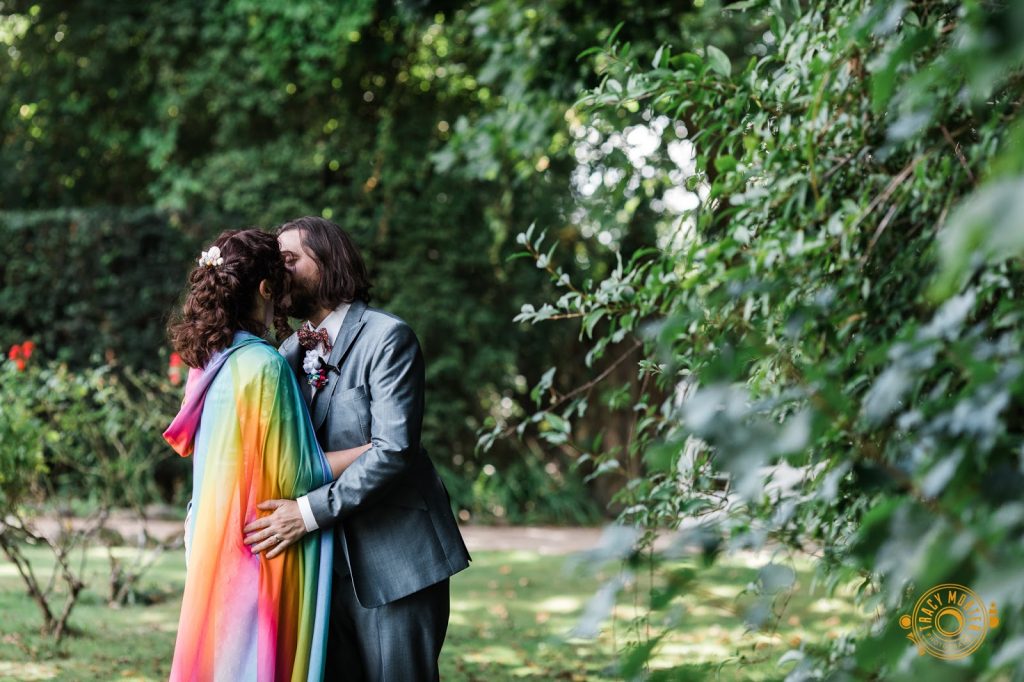
Photo by (the utterly fabulous) Tracy Morter www.tracymorter.com  


One of the obvious areas to save money for the wedding was on hair and makeup.  I decided to do my own, which was hugely daunting as I have two daily hairstyles: down, or loose bun (or ‘flower’, as my youngest calls it).  I also have two fancy hairstyles: I can straighten my hair, or I can rag curl it.  

For the wedding, rag curls seemed most bridal and most unlike the everyday.  

I have a set of Remington Hair Envy Heated Rag Rollers, which plug in in their case and are very easy to use.  If you wanted to use zero electricity and chemicals, you could easily do this style using the more traditional method of tearing rags and applying them to damp hair.  

Rag rolling creates lovely ringlets in even the most stubborn, fine, straight hair, which you can separate with fingers to make into loose curls.  

I watched a few YouTube tutorials to help me perfect my method and found this blog helpful http://offbeatbride.com/rag-curls/

My hair is fine but plentiful, straight on top with a slight wave / kink. I am of mixed white British and Irish heritage.  When I began practising, I had a long bob, which was slightly longer at the front, much like Mandy Moore in this Pinterest picture (yeah, honest…)

The bob responded pretty easily to rag curls, as in this first attempt, the summer before (planning is everything…).  

However, as I couldn’t imagine getting married without my old, long hair, I had grown it quite long by the wedding.  The back just didn’t work down by this stage – it was too haphazard and not curly enough, and was best roughly pinned up with the nicely-curled front down and loose, a la Lizzie Bennett in 1990s Pride and Prejudice.

Lizzie Bennet

I put my hair into rollers first thing on Friday, before we left London to head out to Kent to our Saturday wedding’s venue.  To keep the rolls from falling out and / or bashing me in the forehead, I wrapped them in this Liberty silk scarf.  My about-to-be Mother in Law tidied up the back into the scarf for me when we got there, which I really appreciated, as the back kept unrolling.  

Day Before Hair


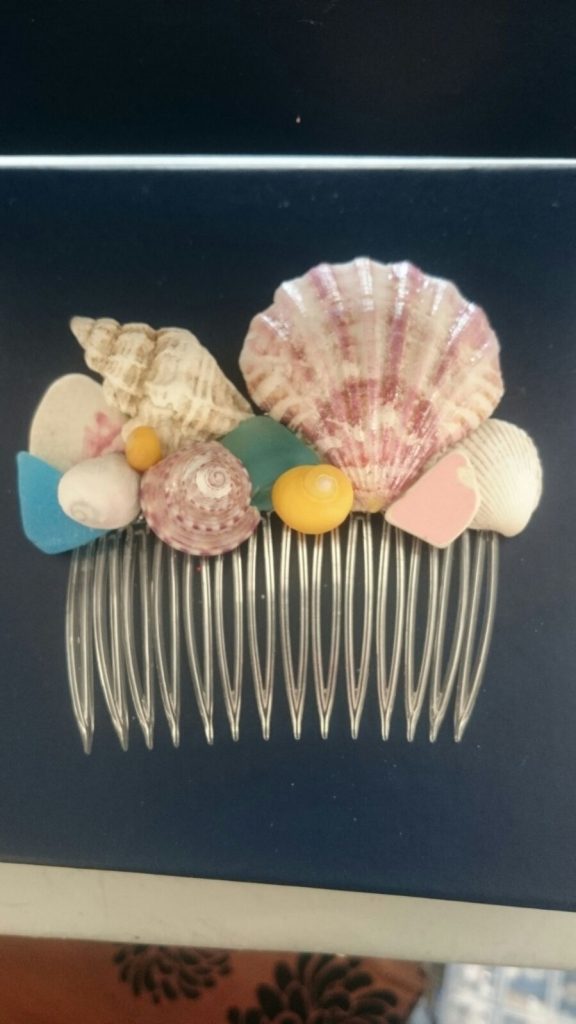
On the wedding day, I got extremely nervous about taking out the rolls, so one of my lovely bridesmaids came into the bathroom with me as moral support.  Once unrolled, it was fine and dandy. I swept back my hair into the shape I wanted, and my lovely friend helped me pin it up.  Honestly, if we could put this together in a tiny mirror in a dormitory bathroom with a puddle of wasps on the floor, you can DIY your hair, gorgeous ones!  Just before we left, my wonderful sister fixed in my rainbow mermaid comb, made for me by the massively talented Irish designer Alice Halliday from sea pottery and shells (http://www.alicehalliday.com/ ).


Alice Halliday comb – this is bespoke, but others are available on Alice’s Etsy shop https://www.etsy.com/uk/shop/AliceHalliday 

I avoided using hair spray as no matter what I did during practice runs, my very fine hair ended up heavy and crispy with it.  I had put a curl activator through it on Friday morning.  The key is to roll up your hair when it’s damp, and to trust it to dry out overnight.  The curls really stick for hours, and fall out elegantly enough. Here they are at nearly midnight…

Back to the day of the wedding… After the ceremony, back at the reception venue, I needed to fix my hair and completely lost the ability.  We were still waiting for the second mini-coach to bring guests, so I had a few minutes to fix it.  One of my oldest friends happened to bump into me as I came out of the bathroom having given up.  She sat me down in the breakfast room and the two of us caught up as she gave me a new hairstyle in five minutes flat – something she had last done in 2002 when we were students.  Complete with rainbow mermaid comb, it was magical.

Photos by Tracy Morter www.tracymorter.com

It was important to me to get my hair right for the wedding, and I am very happy with how it turned out.  My hair and I have history.  I grew up with bum length hair, and chopped it all off not long after my mum died, while I was caring for my newborn, first child.  I wrote about that here https://saranesbitt.co.uk/2013/03/14/cutting-my-own-hair-short-an-act-of-grief-identity-or-silliness/


(Un)Crafty Bride on a Budget: Handmade Fabric Bouquets, Origami Flowers, and Flower Baskets

Making our wedding flowers was a long and rewarding part of preparing for a highly personal, low-cost and (relatively) environmentally-friendly wedding.  I’m posting about this first, as if you’re planning to make your own flowers, it’s good to start early, so you can pick up and put down this project as time, leading up to your wedding, goes by.  I had never made flowers before, and with some help from friends and strangers, was able to make my own bouquet, and my seven (!) bridesmaids’.

Here is my bouquet — made from the petticoat of my daughters’ outgrown, 2-year-old-size summer dress.

Why would I have needed to make flowers?

Wedding flowers cost hundreds of pounds, cheap cut flowers are often not friendly to the environment.  What’s an uncrafty bride on a budget to do?

Make flowers.  

What sort of flowers? You may well have a theme or colours for your wedding.  For years, I held onto a dream of having a rainbow of bridesmaids; however, after looking at a few Pinterest images, I decided it didn’t work visually.  I had seen that when a group of bridesmaids stood in a line wearing dresses in every colour of the rainbow, they looked like a rainbow, but I imagined that as soon as they reconfigured or mingled or moved – which I very much wanted my bridesmaids to do – they’d look like guests, in block colours.  

The rainbow was still an important motif for a number of reasons, but another one had become important: my bridesmaids as backing singers.  These were the women who had been there at all the important times, who brought the glamour of true friendship and love.  They have always been with me, backing me. I love backing singers.

I also wanted my loved ones to be comfortable.  So, I asked my bridesmaids to wear their little black dresses (or catsuits / trouser suits / skirts and tops), like backing singers, and to each choose a colour to accessorise with.  Then I made bouquets in their rainbow colours.  

Photo by the brilliant Tracy Morter (www.tracymorter.com ). Three brilliant women. Three out of seven rainbow flowers…

As established in my ‘Why So Many Clothes?’ diary (https://saranesbitt.co.uk/2011/06/12/why-why-so-many-clothes/), during which I wore everything in my enormous wardrobe, I have a tendency towards holding onto clothes.  This meant that when it came to finding meaningful materials to make my flowers, I had plenty.  

I used fabric from our daughters’ outgrown summer dresses.  Around the necks, there were the usual toddler stains etc., which meant they were not good hand-me-downs.  However, much of the fabric was gorgeous and colourful and, importantly, connected to our union.  If you’re making your own bouquets from old clothes, first date clothes might be another interesting fabric, or anything that is unwearable but has some kind of history.

A friend added me to the Facebook group, A Make Do and Mend Life, early on in wedding preparations.  This helped a lot: a community of people who are generous with their skills and advice and gently passionate about conservation.  I was advised to get myself a glue gun and given some ideas on how to make the fabric into flowers.

The method I went with in the end was a combination of several, and well suited to my rudimentary craft skills.  

  1. Cut a strip of fabric, about 2-3 inches wide (4-5 cm), and longer than 12 inches (30cm).  
  2. Thread a needle with a length of cotton, doubling it up and tying several knots in the end so that the knot hooks onto the fabric when you make the first stitch (much like you will have learned at Primary School).
  3. Tack along one long edge of the fabric strip (to tack means to do a very basic stitch, in and out. I know this from a friend who customises all her clothes. She is amazing).
  4. When you get to the end, pull.  The fabric will gather along the edge with the stitches in.  Pinch this fabric between your fingers as it gathers, so it forms the base of a bloom.
  5. Poke a piece of florist wire inside the gathered fabric.  
  6. Apply hot glue to it from your hot glue gun.
  7. Squeeze the fabric into the hot glue to stick the wire to the flower and cover up any dodgy stitching (being careful not to touch any hot glue so you don’t burn yourself).
  8. When you have made enough flowers for a bunch, wrap all the flowers together with florist tape.  This tape doesn’t appear sticky until you apply a mild stretch to it and then it activates – great fun.


Total Cost: approx £26

Fabric – reused (free)

Hot glue gun with glue sticks – approx £20

Florist tape – approx £3 per roll

Florist wire – appox £3 for 100 ‘stems’

Time: on and off for months.  Once you get the hang of it, you can make three or four at a time while catching up with a TV show, listening to a bit of music, or even having a drink and chat.

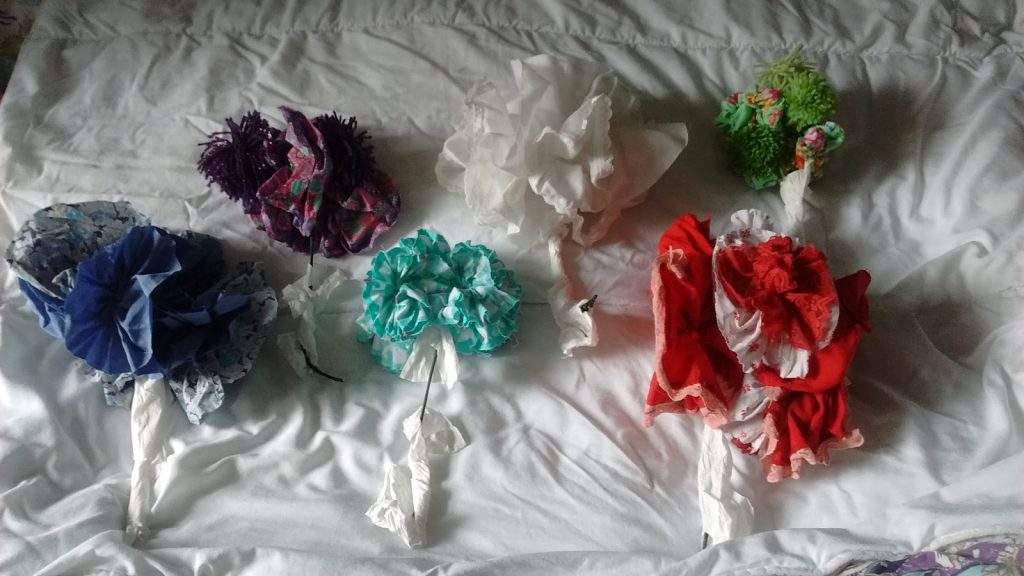
Floppier fabrics were less useful; starchy cottons were best.  I filled in smaller bouquets with woolly pom poms (more on those in another post).  This is my picture of the bouquets, their stems wrapped with tissue just in case the English summer got really hot and the wax on the florist tape bled (almost wishful thinking…)

After the ceremony, the flowers went back to the venue and into glass jars on the tables.


A Little Rustic Stitching…


Flower Girl Baskets

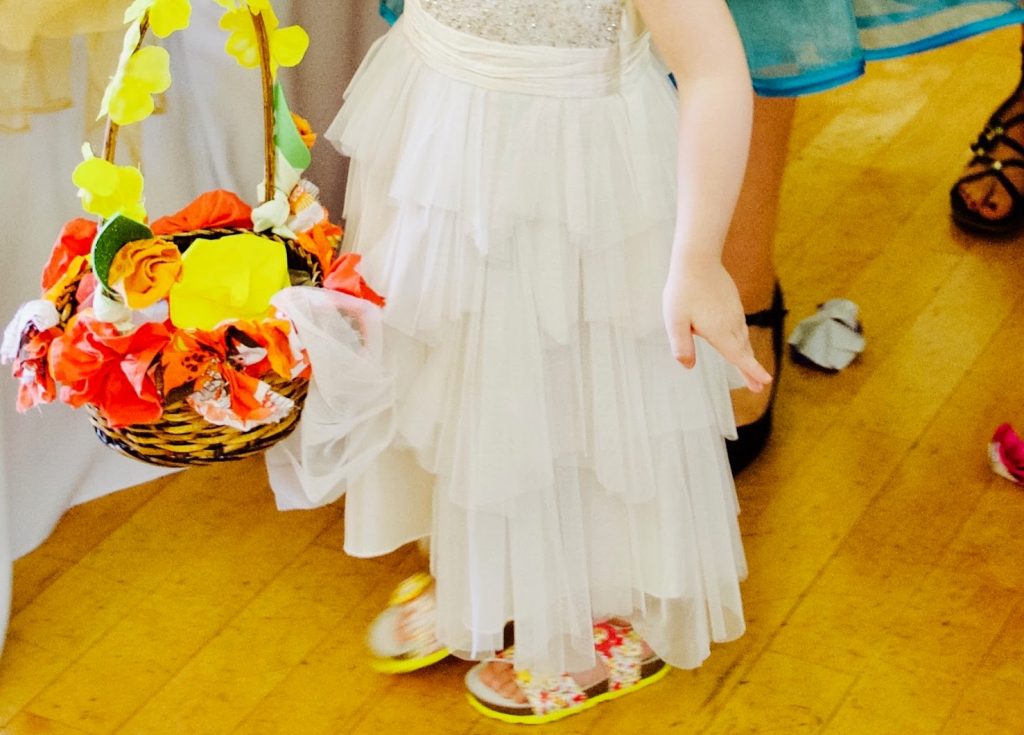
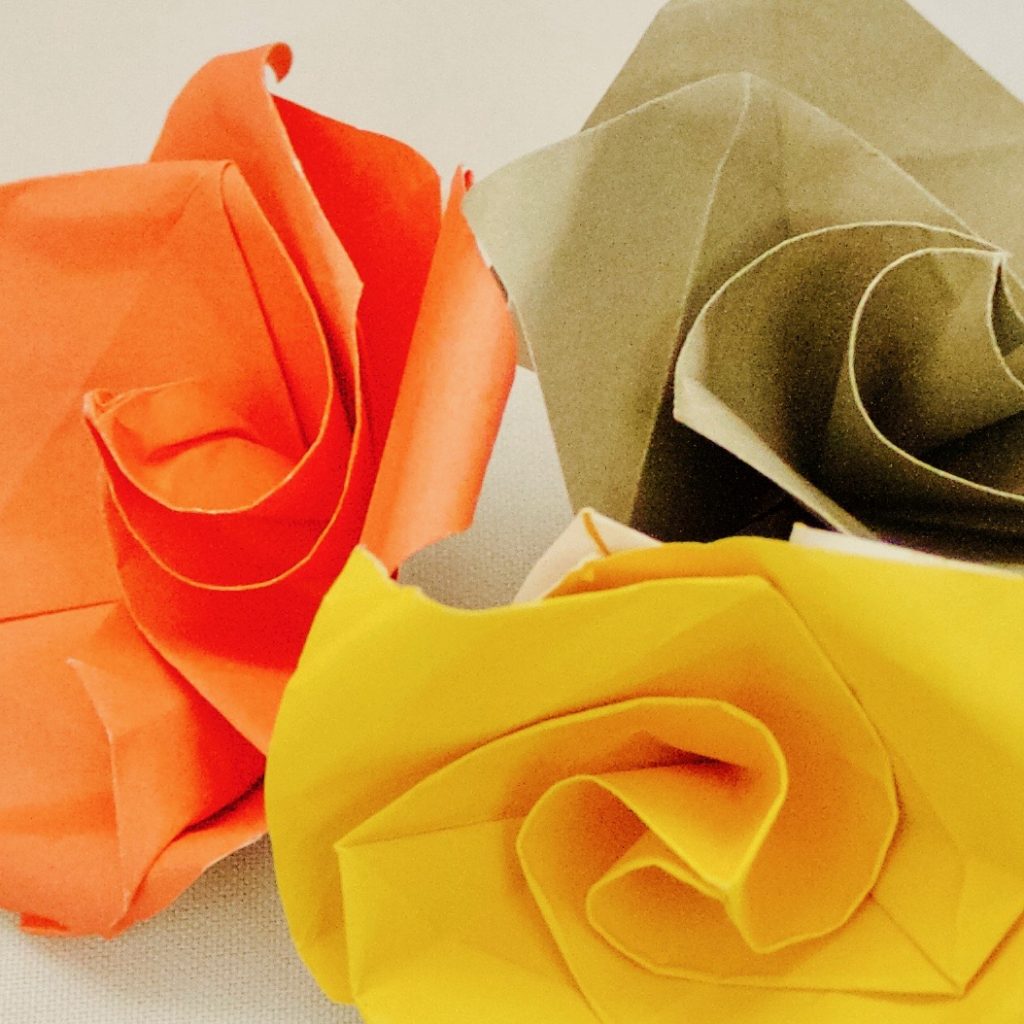
As well as the bouquets, we decorated two baskets found in a local charity shop with the fabric flowers.  Two lovely friends and I spent a fun evening trial and erroring making origami flowers, finally finding a video we could follow on YouTube.

We filled the flower baskets with the origami flowers and they were scattered to make a colourful path down the aisle.  It was a perfect way of bringing our wedding into the Town Hall.  

Total Cost: £6

Origami paper – friends decluttering (free)

Baskets – £6 from charity shops


Time: a very enjoyable evening, plus a few extra origami flower making sessions while watching First Dates.  

With huge thanks to Natalie S for additional photos.

The Origami Flowers, made from this YouTube video https://www.youtube.com/watch?v=jm_4hFPFAOU


(Un)Crafty Bride on a Budget

I’ll be posting regular DIY wedding blog posts with

  • Tips on creating a personal, beautiful DIY wedding
  • Low-cost ways to make your wedding day perfect on a budget
  • Environmentally-friendly, sustainable options
  • Links to professionals who are excellent at what they do
  • Especially for the enthusiastic, give-it-a-go, non-crafty crafters and DIYers, like me!
  • A whole lot of love